Tuesday, October 2, 2012

Home Redo -- Master Bedroom

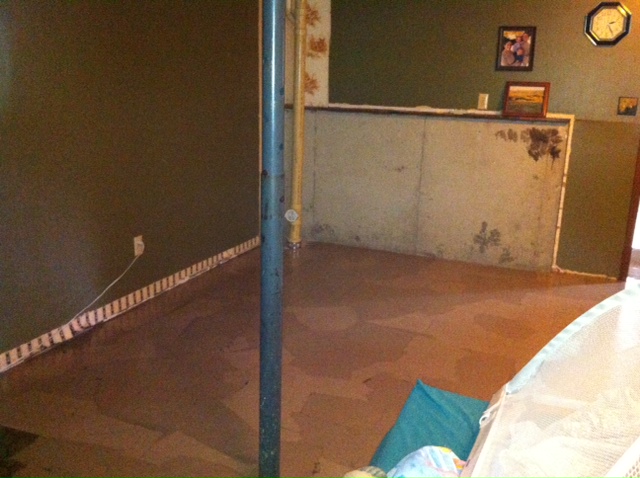
Ok, we finally got our bedroom redo pretty much finished, just in time for our out-of-town guests to stay in last week!  As a reminder, here's how it looked before.  Ugly, ugly, ugly.

Please excuse the darkness of these pictures, but here it is now!

This is taken while standing in front of my closet.  In this picture, you can see the support bar coming down.  We still plan to enclose that in a wood pillar.  The yellow room straight ahead is our bathroom.


Here's toward the bed.  I see now that I didn't have pillows on it yet.  Whoops!


Here's in the bathroom.  Yes, we have a piano in our bathroom.  This bathroom is ridiculously huge and open to the main bedroom, so humidity isn't a problem.  I LOVE my piano!!


When we were redoing the bathroom, I wanted to get rid of the ugly light fixtures they had.  I wanted something more rustic looking.  I couldn't find anything I liked that wasn't super expensive.  Finally, on a whim, I checked the outdoor light section at Wal-Mart and found these lights.  They look like lanterns, are adorable, and were only $15 for two of them!!!


I HATE windows in a bathroom.  Our neighbor's back patio is right outside our bathroom window.  One night, while I was showering in our GLASS shower, my cat pulled down the curtains.  I was determined after that to cover the windows.  I found this great window cling pattern at Lowe's.  It goes great with the gold walls.


Here's looking back into the main room from the bathroom.  You can see my husband's desk to the left, my sewing table to the right.


It's so nice to finally be all settled in!!


Pin It

Saturday, September 22, 2012

Fragrant Home

I LOVE to have my home smelling good.  Now that my daughter seems to have outgrown her asthma issues and fragrance sensitivities, I've been enjoying some fragrance again.

I think I've maybe said before how much I love my candle warmer.  I'm talking about one of those ones that you lower the large jar candle down into and it melts it without having to light the wick.  However, my brother (who is a firefighter) told me last week not to use it again.  He said that he has run calls where the candle's glass has shattered and the candle warmer started a fire.

He told me instead to use the wax warmers that uses a small lightbulb.  (I'm behind the times--you all probably already have one of these, right?)  So we went to Wal-Mart that night and bought one (ours is the Better Homes and Gardens brand).  It was a mere $12 for a small one.  Isn't it pretty?


You just turn on the bulb and put a wax cube in the top.  Here is an unmelted cube.


Not long after you put it in the dish at the top, it's melted.  This one little cube is enough fragrance for the whole upstairs of my house.


The wax cubes are only $2 for a six-pack, and there are a couple of brands.  We've had good results from both of these.  The center fragrance is called "Fireside," and so far, it's my favorite!!!


When you're turning your burner off, or if you just want to change fragrances, you can simply pour the wax back into the container to use again next time.


I'm so going to get another one of these for downstairs!!  I'm loving the fall fragrances right now.  What are your favorite fragrances in your home?


Pin It

Wednesday, September 19, 2012

Our new boy

So, I told you all that we recently lost our dog, Darby.  We were going to wait a few years until we were settled in our new house to get another dog.  I guess God had other plans for us.  And who am I to argue?  

So meet our new baby, Hurley.


He's a decent-sized dog, a two-year-old boxer mix.


Who can resist this mushy face?


He's a big lover, but is already protective of the kids, which I LOVE.  Here's his favorite place to lay, though:  ON my feet.


He's a gorgeous reverse brindle and is simply a great dog.  He's a perfect fit for our family, and I'm so glad circumstances worked out to make him ours.  I'm looking forward to many, many years with our new boy!


Pin It

Friday, September 14, 2012

T-Shirt: Storm Finished (X-Men)

Ok, so I had already posted my sketch and Storm sewn together, but I haven't posted the final thing.

I played around with painting lightning bolts on the shirt, but decided to go ahead and finish the whole thing in felt.  To be honest, the idea of painting on the shirt kind of scared me.  A fact which a friend of mine found quite humorous, apparently.  But, as I told her, stitches can be ripped out.  Paint is permanent.

I'm glad I went ahead with felt, because I love how she turned out!!


What do you think?

Pin It

Tuesday, September 11, 2012

Homemade Ice Cream --Dairy-free and gluten-free

We love making ice cream in our Blendtec.  The problem is, our two-year-old daughter is severely allergic to dairy.  So she had NEVER had ice cream.  The milk in the recipe isn't the hard problem--we can easily substitute her almond milk.  But the recipe also calls for powdered milk.  I was told that any kind of powder will work, so I ordered an expensive, organic protein powder and added it to her milk one time.  She refused to drink it.  I emailed the company to learn that they use latex gloves to load the empty cannisters onto their conveyors (she's severely allergic to latex, too).

The other day, I was looking in the pantry and noticed our full box of infant rice cereal.  I thought to myself, that's a powder, too, right?


So I decided to experiment and see if it would work.  And it did!!

So, to make dairy-free ice cream in your Blendtec, add (in this order):

2/3 cup almond milk (or rice milk, or whatever.  I use vanilla almond milk)
2/3 cup infant rice cereal
2 tsp vanilla (I omit this because I use vanilla almond milk)
1/4 cup sugar
2 1/2 cups ice cubes (sometimes I replace some of this with frozen berries)
2/3 cups almond milk (again, I use the vanilla)

(The extra almond milk is needed at the end, I believe, because the rice cereal absorbs so much moisture.)

Once all of this is in the Blendtec, just press the ice cream button!

Within about 1.5 minutes, you have ice cream!


I have gluten-free and dairy-free chocolate chips, and the kids love these on top.


My daughter LOVED her first ever taste of ice cream!!!

I think I may try this next time with some finely ground coconut flour.  Yum!!


Pin It

Friday, September 7, 2012

Homemade Chili Seasoning -- Gluten-Free!

We are now well into the "bers."  You know, SeptemBER, OctoBER, NovemBER, DecemBER.  This is by far my favorite time of year.  I LOVE autumn, I LOVE crisp, chilly weather, I LOVE curling up on the couch with a mug of hot coffee and a fleece blanket.

This time of year always makes me crave chili--even before it's cold out.  I went to make chili today and halfway through realized that I'm out of chili seasoning.  I have a cabinet full of dried spices, so I decided to make my own.  It turned out super yummy, so I thought I'd share.


Combine:

2 Tbsp chili powder
1 Tbsp crushed red pepper flakes (less if you like it less spicy)
1 Tbsp dried, minced onion
1 Tbsp dried, minced garlic
2 tsp sugar
2 tsp cumin
2 tsp dried parsley
2 tsp salt
1 tsp basil
1/4 tsp ground black pepper

(Make sure all of your spices are gluten-free, if necessary.)

Measure everything into a small container and shake to mix.


Add seasoning to your chili to taste.


Yum!  I can feel fall coming...

My favorite way to eat chili is on a baked potato, topped with cheese.  What's yours?


Pin It

Friday, August 31, 2012

We're all a bit blue

We had to put our dog down yesterday, so things have been pretty melancholy around here today.


He wasn't old--not quite seven, actually--and he was the most perfect dog we ever could have dreamed of.


Would you believe, of all the things you may have to put a dog down for, we had to put him down because of allergies?  Not our allergies, or our kids' allergies, but his own.  You'd think I have allergies down to a fine science by now.  We tried all sorts of different allergy medications, grain-free diets, steroids shots, etc.  But nothing worked, and it got to the point where he was scratching all of his hair off and making himself bloody.  He was too good a boy and too loyal a companion for us to let him live with that suffering.


So forgive me if I'm not feeling very creative today.


Pin It

Tuesday, August 28, 2012

Needing House Ideas

We're moving!!  No, not today, or tomorrow, or even next year, unfortunately.  We're moving in two years.  And I CAN'T WAIT!!  The country girl in me is dying to get back out to the country again.  To run through the fields and watch my kids run through the fields--not just because they're visiting my parents, but because it's our own land.  And now it is.  My parents are giving us a chunk of their land, and my kids will of course have their run of the entire thing.  Woods, ponds, creeks, fields...the same ones I ran through as a child.  Am I waxing nostalgic?  Why yes, yes I am.

Here's where our house will sit.


You can see the pole, where the electric is already run back here.  The house will nestle right up against the woods.

Here's one of the creeks back in the woods.  You can tell both the creek and the trees have suffered from this super hot and super dry summer.


Nobody's been out in the woods much since us kids left home.  There will be TONS of old, dead wood we can gather for a wood-burning stove or fireplace...

Here's the main fishing pond.  You can see that it, too, has suffered from this hot, dry summer.  We have plans to dig it out and connect it to the front fishing pond and make it one, large one.


This will be located out in front of the house.  Our driveway will skirt around it.

We have plans for dairy goats and chickens.  A large garden, too.  Sometimes 2 years seems like an eternity away.  Sometimes it seems like it's so close I don't have enough time to get ready for it!

I'm currently designing our dream home.  I need your help.  Please leave a comment with suggestions.  What do you hate about your house, that you'd change if you could?  What do you love about your house that you'd never want to live without?  If you have experience with dairy goats and chickens, what breeds are your favorites?  How did you design your coop/barn?  I want to know everything!!  =)

Thanks!


Pin It

Friday, August 24, 2012

Product Review: Green Bees Diapers

I'm a cloth diaper user.  I LOVE cloth diapers!  These are not your grandmother's cloth diapers.  The cloth diapers nowadays are just as easy to use as disposables, are just as easy to wash as your regular laundry (though have a system all their own), and are waaaaaaaaay cuter than anything you throw away!!!

(Sorry for the blurriness of this picture.  My 6-month-old is already pulling up to standing and is impossible to keep still!)


I have several brands of cloth diaper in my stash.  My typical go-to has always been Fuzzi Bunz.  After going through 3 children, my size medium Fuzzi Bunz are getting fairly worn-out.  Fuzzi Bunz are a great diaper.  However, they are on the pricey side, so I was hesitant about replacing them.

While playing in the Great Cloth Diaper Hunt earlier this month, I learned about Green Bees diapers. They're a one-size pocket diaper, fitting a child from 8-35 pounds. You can't beat the price, so I decided it was worth it to order one and try it out.  I'm so glad I did!!  I ordered mine from Bottoms & Beyond Boutique.  (I also found her through the Great Cloth Diaper Hunt, and she has great shipping prices!)

I started out with a solid brown one.  It fits my daughter GREAT, even though she's a tiny and petite little thing.  Here she is modeling it for you.


There are snaps to adjust the rise (height) of the diaper, snaps to adjust the tightness around the thighs, and snaps to adjust the waist.  Each diaper comes with one or two microfiber stuffers (depending on which diaper you order).

Once I realized how much I LOVED that diaper, I went ahead and ordered some more.  The giraffe print diaper in the first picture above is also a Green Bees.  It is minky (soft and fuzzy) and so cute!

So, if you're wanting to try pocket diapers and the cost is making you think twice, or if you're needing to replace or add to your current stash, definitely try out Green Bees diapers.

I'm sorry if this post sounds like a commercial.  Green Bees has no idea I'm writing this post (and neither does Bottoms & Beyond Boutique).  I only do product reviews on products that I use in my personal life and strongly believe in!

Pin It

Tuesday, August 21, 2012

T-Shirt: Storm (X-Men)

Yes, folks.  It's another t-shirt!  I hope you like these, because I'm enjoying making them.

One of my nieces will be turning 8 next month.  She asked me to make her a shirt with Storm, from The X-Men.

As usual, I started with a sketch.  This one was harder for me, I think because she's a rather voluptuous woman.  As my friend, Jenine, said, I want to keep her "kid-friendly."  However, I still wanted her to have some feminine curves.  I think I accomplished both.  Here's my sketch:


Here's the result.  I haven't sewn her down to a shirt yet.  Once I do, I think I'll do lightning bolts from her hands with a yellow, shimmery fabric paint.


I love how she turned out!  Feminine, yet kid-friendly, right?


Pin It

Thursday, August 16, 2012

Cooking Plantains

A friend of mine gave me a whole case of plantains!  WOO HOO!!!  They were already ripening, so I waited until they were very ripe and sweet before I cooked them.

First I sliced the plantains, poured oil into a skillet so they were halfway submerged, and lightly fried them over medium heat.  They're sweet and delicious, even eaten by themselves!


I then browned beef, adding lots of garlic, onion, and salt.  Once cooked, put it in a bowl and chop the cooked plantains (now called amarillos) into it.


The sweet of the amarillos combined with the flavorful saltiness of the beef makes a DELICIOUS and hearty main dish!  It's kind of a simpler version of pastelon de amarillos or piononos, two of my favorite Puerto Rican dishes.

Do you eat plantains?  If so, how do you prepare them?


Pin It

Monday, August 13, 2012

Master Suite Progress

We've been working on doing brown paper flooring in our master bedroom and bath room.  It's coming along beautifully!  It's actually really fast, when you have the chance to work on it.  We're about halfway done, but have only worked on laying it 2 days.

Here it is before the polyurethane:


Here it is after:


I think it's gorgeous!  We need to hurry up and get it finished.  Then, we're going to build a pillar around that horrible metal pole pictured above, paint all the walls (still dark green in the room, dark gold in the bathroom), and get all the furniture back in place.

Exciting!!


Pin It

Tuesday, August 7, 2012

Redoing Master Suite

When we moved into this house, the room that is now our bedroom had gross carpet in it.  The bathroom had another, even grosser carpet (I think any carpet in a bathroom is gross).

Here is how it looked when we first moved in:

This is standing in the bathroom, looking down into the bedroom.


This is the bathroom.  That medicine cabinet on the wall is the type that's supposed to be set back into the wall.  And it was so high, I could barely see my eyebrows when I looked in it (which isn't saying much, since I'm only 5' tall).


Here are a couple more shots of the bedroom.  The walls were pink on top, wood panel on the bottom, and a couple of other walls were wallpapered.


To make it even better, before they painted it pink, they had this wallpaper:


And I don't have a good picture of it, but the globes around the lights had ducks on them.  I totally like a woodsy theme, but I think squirrels on the walls are a bit much.


This is our bedroom at the moment:


We've ripped up all the nasty carpet, and we pulled down the wood paneling.  The floors will be brown paper flooring, the walls a dark pine green.

This is the bathroom at the moment:


We've already painted these walls a deep gold.  We're also doing brown paper flooring in this room.  I'll show other details in the after pictures.  Hopefully it'll be finished next week...


Pin It

Friday, August 3, 2012

T-Shirt: Luigi (Mario Brothers)

Ok, so it has been a way-crazy week.  However, I've still managed to squeeze in enough time to make my 13-year-old niece's t-shirt!  

She loves Luigi from Super Mario Brothers.  However, it's rare to find a shirt with just Luigi on it, as Mario seems to be the most popular character of the two.  So when I asked her what or whom she wanted on her shirt, she immediately answered Luigi on a purple shirt.

Most of my characters on my shirts are kind of cartooned-down-versions of the real characters (see some of my other t-shirt creations here).  Since Luigi is already cartoonish, I pretty much simply copied exactly what he looks like and made him in felt.

Here's my sketch:


Here's the final result!


I love layering for the 3-D detail.


I think this is one of my favorite ones I've made!!


Pin It

Saturday, July 28, 2012

T-Shirt: Link (The Legend of Zelda)

I love making character t-shirts.  One of my 14-year-old nephews asked me the other day if I would make him one.  He decided that he'd like me to make Link, from The Legend of Zelda.

I started, as always, with a sketch of Link, his sword, and his shield.  His shield was kind of difficult to decide which details I wanted to leave in and which would come out good in felt.  


Once my nephew approved the sketch, I went ahead and made him out of felt.


I'll sew him down to the t-shirt tonight (my nephew wanted him on black).  Meanwhile, my other 14-year-old nephew told me that he'd also like Link on a black t-shirt.  So I went ahead and made another.


I'm getting ready to do Luigi for my niece.  That one should be a lot of fun!

I've been thinking about making my sketches available on PDF, in case any body else wanted to use them.  Would anybody be interested?


Pin It