Showing posts with label soap. Show all posts

Friday, June 1, 2012

Removing Fruit Juice Stains

I don't know about you, but my kids seem to be able to get food on their clothes no matter how big a bib you have on them or how many times you tell them to close their mouths when they chew.  I could probably feed them naked into a sterile bubble, and the food would somehow find the clean clothes in their drawer and smear itself all over them.

Of course, it's not always the kids.  My hubby recently got cherry juice on a white shirt (in his defense, my nephew was helping him pit cherries, and he claims that it was actually the nephew who got it on his shirt).  


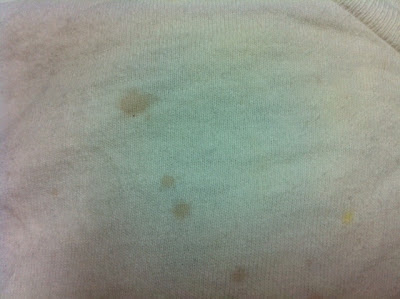
I was told to pour boiling water over the stain, that it would come right out, and that cold water would set the stain in.  I tried this (once the stain was dry and the shirt removed, of course), and the stain did not come out, though it was diluted.


So I tried following up with a wash in hot water with Charlie's Soap.  It still didn't come completely out.  (Contrary to what I was told, I think the boiling water actually set the stain.)


My 5-year-old daughter once got raspberries all down the front of her brand-new white shirt.  (Seriously, who takes their little kid to a church pot luck in a brand-new white shirt?  And then lets her eat raspberries?  Yeah, not too bright here.)  Once we got home, I got the shirt wet with cold water and rubbed a bar of real soap on it (as in, not store-bought "soap," which is really detergent.  For your own real soap, find a tutorial here).  Then I threw it in a cold wash with Charlie's Soap.  It came out beautifully white and still is (though terribly wrinkled at the moment)!


The moral of this story is:  Don't pit cherries or eat raspberries in a white shirt.  But if you do, rub the stain down with REAL soap, and wash in COLD water (preferably with Charlie's Soap).
  
Pin It

Friday, August 19, 2011

Castile Soap Tutorial


Ok, I've had a few people ask me for an actual tutorial on hot process soap making.  Well, I aim to please, so here it is!!  If you have no idea what I'm talking about, you can read a kind of intro here.

I'm not very experienced at writing tutorials, so if there's anything you don't understand, PLEASE ask me so I can clarify it for all.

**Disclaimer:  I am in no way responsible for any damage, injuries, etc that may come from using lye, crockpots, or anything else in the making of this recipe.**  =)

This recipe isn't the most luxurious, but it's still nice and moisturizing and way healthier than most anything you buy in the store.  This is also among the easiest, cheapest, and most hypoallergenic soaps you can make.  Once you get the actual process down, you can apply it to other soap recipes you find.  Soon you'll have fun experimenting with different additives, oils, fragrances, etc and making a wide variety of soaps.


The recipe we are using today calls for:

54 oz olive oil
16 oz distilled water
7 oz lye
essential oils are optional

Start by gathering a few basic supplies.  Pictured below are olive oil, distilled water, a scale that weighs to the tenth of an ounce, measuring containers (preferably not plastic), spoons, and lye.


Make sure you get 100% lye (sodium hydroxide).  I buy mine at Westlake Ace Hardware.  It can be found in the plumbing section with the drain cleaners (a common use for it).  Don't worry, once the soap is finished, the lye is fully saponified--that is, it has all reacted with the oils and is now soap and is no longer caustic.   *For more on lye, it's history, and its source, scroll to the bottom of the post.


You also need a crock pot, stick blender (unless you like to stir by hand for 2+ hours, nonstop), and a spray bottle filled with half soapy water and half vinegar to neutralize any residual lye in measuring cups, etc.


When the soap is finished, you will need a mold.  I use a simple 9x13 lined with wax or parchment paper and sprayed with olive oil.


Start by turning your crock pot on low.  Then weigh out 7.0 oz of lye into a glass container (the lye will static cling to plastic).  I'm going to assume that you know how to tare your scale and weigh accurately.  If you don't, make sure you learn before you begin.


Weigh 16 oz of distilled water into a separate container.  16 oz equals 1 lb.  Make sure you're familiar with your scale and its units.  You can see here that once mine hits 16 oz, it switches over to pounds and ounces.


Now take your water, lye, and a plastic spoon outside.  When you mix lye with water it causes a chemical reaction.  Your glass will get hot, so make sure it's sitting securely on a table.  It will give off fumes that you don't want to breathe--that's why it's best to do it outside.

IMPORTANT:  Pour your lye slowly into the water.  Do NOT pour the water into the lye!!!


As you slowly pour the lye into the water, stir with your spoon until it's all added and dissolved.  The solution will be milky white.  Leave it sit outside for now.


Go back inside and spray the container that had the lye with your soapy water/vinegar mixture to neutralize any lye residue.  Also spray your skin anywhere that lye happens to touch.

Now weigh out 54 ounces of olive oil.  Unless you're doing it in a very large bowl, you probably won't be able to fit it all into your measuring cup.  So be sure to keep track of your math and know how many ounces you've measured!  Here you can see that I've weighed out 32 ounces (2 lbs) so far.


Pour the oil into the crockpot, then go outside and get your water/lye solution.  It should now be clear.


Carefully add the lye-water to the oil in your crockpot.  The lye will sink to the bottom and you can see it starting to react with the oil on the bottom.  Neutralize the measuring cup that had the lye/water in it with your soapy water/vinegar mixture.


Get your stick blender and start to blend.  Make sure that the blender is fully submerged and not splashing.  Also make sure you keep it at an angle so it doesn't suction to the bottom of the crock pot.  If you do splash or spill any, make sure to neutralize it with your soapy water/vinegar mixture.


You will blend for 3-5 minutes or so, until it reaches trace.  You will know it has reached trace when it's like a thick pudding and somewhat holds shape when you pull the blender out.  (Make sure you do not pull the blender out while it's still running, or it will send caustic lye mixture flying everywhere!)  This is what trace looks like:


Put the lid on your crock pot and let it cook.  Meanwhile, rinse your stick blender with your soapy water/vinegar mixture.

While the soap cooks, prep your mold.  I simply put some wax paper or parchment paper across the bottom of a 9x13 pan and spray the whole thing with olive oil.


Now you wait.  About 25 minutes into the cook (all times are approximate, as every crock pot cooks at slightly different temperatures), you will start to see the soap wave at the edge.  Castile soap doesn't wave as much as other recipes, but you can see it here.  (I don't recommend lifting the lid during a cook, but I wanted to show you a good picture.)  See how along the left edge it's getting darker, more transparent, and kind of raised?


As it continues to cook, the waves may rise against the lid.  With some recipes, the waves may even lift the lid.  Here you can see it waving against the lid.


Here's my soap at approximately 45 minutes.  You can see that there's still an uncooked island.


10-15 minutes later, and it's all done!!  Every recipe cooks at a different time, so especially if you're trying a new recipe, check it often.  When the island is gone, stick a spoon down the center of the soap and make sure it's cooked all the way through.


Turn off the crock pot and stir the soap.  With some recipes you'll have a nice layer of glycerin on top.  Stir it all in.  In this recipe, you can see a little bit of glycerin around the left edge.  If you plan to add essential oils, let the soap cool for a few minutes then stir them in.  If not, you can go ahead and spoon it into your mold now.


Hot process soap is already saponified and thick at this point, so you're not going to get the perfectly smooth molding that you do with cold process.  I like mine rustic and rough, so I don't smooth it much.


Now you just wait until it is all opaque.  Here's a batch that isn't quite solidified yet.


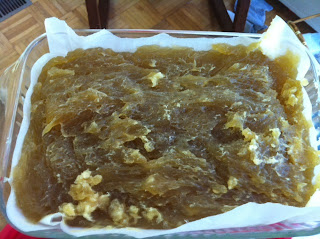
It takes several hours to fully harden.  Once it's all opaque and hardened, it's ready to cut, just a few hours after being made (as opposed to cold process soap that takes weeks to saponify and cure).


Grab the edges of wax paper hanging over the sides and lift it out of the mold.  You can cut it with a knife or pastry cutter into whatever size bars you prefer.


Yay!  You've now made your own soap!  Wasn't that easy?

*ETA:  In the comments, a reader asked the following question:   why is the lye not dangerous when it turns into soap?

Great question!  The simple answer is that once the soap is fully cooked, there is no longer any lye in it!  Without bogging you down in chemistry details, an actual chemical reaction occurs between the lye and the oils.  Once the soap is finished saponifying, the lye and oils are now chemically changed into soap.  I actually superfat my soaps by 5%.  That is, I use 5% more oil than needed for the amount of lye I use.  This ensures that all of the lye has been transformed, and it leaves extra oils in the soap for extra moisturization.

Lye actually comes from ashes when wood is burned.  They discovered it way back when, when they would burn a fire and cook animals over the fire, the lye in the ashes was combining with the lard in the animal fat (which is another kind of oil) and forming soap.  Back then, however, they had no way to measure exactly how much lye they were using.  That's why if you hear grandmas talking about soap, a lot of times they talk about how it used to burn.  It's because there was too much lye to not enough oil, so some of the lye was left unsaponified.  Nowadays, we don't have that problem, since we use clean, pure lye--and this why we go by weight, rather than kitchen measuring utensils that aren't as accurate.

Anyway, this is the way our grandmas, great-grandmas, and so on made soap!  Only we have so many more options in the choice of oils, and most of us don't use lard (you can make lard soap, but it's not as luxurious as others).  And we can conveniently use a crock pot, rather than slaving over a fire.  =)

Also, please do NOT just substitute other oils in this recipe.  Different oils require different amounts of lye to react with.  Some need less, some need more.  So if you want to use different oils, please find a proper recipe or use a good lye calculator to determine what ratios you need.
Pin It

Thursday, July 14, 2011

Soaping

I only make unscented soap for my family.  And I only make unscented soap in my house.  Remember my Little Love #5 with all the latex and food allergy issues?  She also has asthma.  Except it's not actually diagnosed as asthma, because she's too young for that diagnosis.  The pediatrician once told me, "Well, let's try daily pulmicort for her asthma.  Not that I'm officially calling it asthma."  Later he said, "Well, I don't want to call her a sickly child, but she is sick a lot with a lot of issues."  So I have an asthmatic, non-sickly child who has asthma and is sickly.  =)  We're praying she outgrows it.  This summer has been GREAT--I haven't given her a breathing treatment for the last 2+ months!  Last fall, winter, and spring, she was on breathing treatments every day and was hospitalized twice with bronchiolitis.  I must say, she looks pretty cute with her Bubbles the Fish mask on.


Anyway, back to soap.  Last time I made scented soap in my house, I sent my daughter into an asthma attack.  So no more scented soap here.  It's actually not a bad thing, though.  You see, I have a friend and neighbor, Amanda, who also makes soap.  And we LOVE hanging out together.  So today I got to go to her house during naptime (my hubby was home with the kids) and make soap!  It simply doesn't get much better than that, hanging out with a friend for a couple of hours while doing something fun!

I make soap using hot process.  That means I actually cook the soap (I use my crock pot), forcing it to saponify (change into soap) in about an hour, rather than waiting weeks for it to slowly make the change.  It's great because I can wait until we're down to the last, tiny sliver of soap in our house--which is often accidentally washed down the drain by one of the kids--before I ever get around to making more, and still have soap ready by that same night.  Not that I'd ever wait until the last minute like that or anything...

When I first started, I checked out this book from the library.  It since went out of print and is crazy-expensive new on Amazon, so if you can find it cheaper somewhere, it's way worth it!  Or just check it out from your library.


This is by far the best book you could ever use to get started making hot process soap.  And the author even has a Yahoo group on hot soap making, and she's soooo nice and helpful with any questions you may have.

Things you need are distilled water, the oils you need for your recipe, lye, and whatever essential oils/fragrance oils you plan to use to scent it.  You can also add flower petals, clays, various spices, etc.  The possibilities are virtually endless.

All ingredients must be weighed.  Kitchen measuring tools are not precise enough.  So if you want to make your own soap, get a good, digital scale that weighs to the tenth of an ounce.


As a side note here the above picture is a picture of me weighing out the lye.  Websites and books that talk about using lye in soapmaking always crack me up.  They show people basically wearing hazmat suits.

If you are a soapmaker and wear all the protective gear while making soap, I mean no offense.  I was a chemistry minor in college, and lye is just not a big deal to me, I guess.  Just don't get it on you if it's wet or you're wet.  And if you do get it on you, spray some soapy vinegar water on it and rinse it off.  If you're as clumsy as I am maybe you're wise to wear all the stuff, and I'm just crazy.  But I won't ask anyone who knows me to comment on that.

Anyway, here it is cooking.


While it was cooking, Amanda and I had a blast!  We're both pregnant, so we ate some marinated mozarella cheese balls.  Can you say YUM?!?!?  


Why is it if you're eating plain, healthy string cheese (or, as my kids say, stick cheese) you get so full after one?  But if you marinate the cheese in some oil and add a few spices like above, you can easily eat the equivalent of at least a couple of sticks of string cheese?  Or, if you coat it in breading and deep fry it and dip it in marinara sauce (I LOVE Applebee's mozarella sticks), to where it no longer even slightly resembles its healthy origins but is now a delicious stick of fatty naughtiness, all of a sudden you can eat like 10 of them without batting an eye?  It's just wrong!  

Anyway, after about an hour, the soap gets transparent-looking, and you know it's done.  Then you mix in your fragrance and scoop it into your mold.


I never bother to smooth it out much.  I like the rustic, old-fashioned look.  Once it's all cool and solidified, it's ready to cut and use.  (Ok, this batch below wasn't quite finished.  See how it's not totally opaque yet?)


Once cut, here's your finished product.


Luxurious, moisturizing, and smells great!!  If you have a friend to make it with, even better!  If you're kids are napping, and your friend's kids are napping, and you have some marinated cheese balls, it's a great afternoon!


Pin It

Tuesday, July 12, 2011

Necessity is the Mother of Invention, Right?

So I've always liked "crafts."  I find them fun and entertaining.  But I never made time for them.  Perhaps if I ever would have found that one perfect-for-me craft or hobby, I would have focused more time and energy on it.  But I'm the type that gets bored doing the same thing all the time.  I find something new and fun and run with it--sometimes to faulty extremes--just to get bored and ready to move on to something else.  However, I do like to go back to it once I'm bored with the next few whims.  So I guess I'm more of a rotational-interest type of person.  But again, I just never took much time for any of these whims, anyway.

Then children happened.  A wonderful thing, but life-altering to say the least.  Especially when they end up allergic to everything.  Ok, not really everything, but close enough.  It started out with my oldest being allergic to soaps, detergents, dryer sheets, sunscreens, etc.  So I found the most awesome soap-making book (more on that in a future post) and started making my own.  It turned out fun and rewarding, not to mention giving me the most luxurious soap I'd ever tried!  So that's how that whim got started.  Here are a few of the soaps I've made:


Then, around the time baby number 5 came along--my third girl--I stumbled across the cutest hair clippies in the world, but at a not-so-cute price.  So I decided to make my own, which also led to woven headbands, etc.  So that's how that whim started.   Here is some of my girls' stash:


I've always enjoyed sewing, but I had never gotten much into sewing clothes.  I just did more sewing projects.  However, that baby number 5 I was just talking about had an anaphylactic reaction at 8 months old from being in the same room with two balloons (no, she never touched them).  Latex allergy turned my world upside-down.  How many little girl clothes have no elastic, no spandex, no latex-containing appliqués, etc?  Not many.  So now I'm sewing clothes and loving it.  So that's that whim.  Here are some skirts I made for the girls, using 100% cotton fabric and latex-free elastic.  That way, as my youngest grows into them, she'll be able to wear her older sisters' skirts, too!  (All of my crafts are always latex-free.)


So this blog isn't about sewing, or clippy-making, or soapmaking, or any other kind of making whim I happen upon.  It'll be about the crafting in general, I guess.  Because once you HAVE to do it, and especially once you enjoy doing it, you finally do make the time. Pin It