Showing posts with label gluten-free. Show all posts

Tuesday, September 11, 2012

Homemade Ice Cream --Dairy-free and gluten-free

We love making ice cream in our Blendtec.  The problem is, our two-year-old daughter is severely allergic to dairy.  So she had NEVER had ice cream.  The milk in the recipe isn't the hard problem--we can easily substitute her almond milk.  But the recipe also calls for powdered milk.  I was told that any kind of powder will work, so I ordered an expensive, organic protein powder and added it to her milk one time.  She refused to drink it.  I emailed the company to learn that they use latex gloves to load the empty cannisters onto their conveyors (she's severely allergic to latex, too).

The other day, I was looking in the pantry and noticed our full box of infant rice cereal.  I thought to myself, that's a powder, too, right?


So I decided to experiment and see if it would work.  And it did!!

So, to make dairy-free ice cream in your Blendtec, add (in this order):

2/3 cup almond milk (or rice milk, or whatever.  I use vanilla almond milk)
2/3 cup infant rice cereal
2 tsp vanilla (I omit this because I use vanilla almond milk)
1/4 cup sugar
2 1/2 cups ice cubes (sometimes I replace some of this with frozen berries)
2/3 cups almond milk (again, I use the vanilla)

(The extra almond milk is needed at the end, I believe, because the rice cereal absorbs so much moisture.)

Once all of this is in the Blendtec, just press the ice cream button!

Within about 1.5 minutes, you have ice cream!


I have gluten-free and dairy-free chocolate chips, and the kids love these on top.


My daughter LOVED her first ever taste of ice cream!!!

I think I may try this next time with some finely ground coconut flour.  Yum!!


Pin It

Friday, September 7, 2012

Homemade Chili Seasoning -- Gluten-Free!

We are now well into the "bers."  You know, SeptemBER, OctoBER, NovemBER, DecemBER.  This is by far my favorite time of year.  I LOVE autumn, I LOVE crisp, chilly weather, I LOVE curling up on the couch with a mug of hot coffee and a fleece blanket.

This time of year always makes me crave chili--even before it's cold out.  I went to make chili today and halfway through realized that I'm out of chili seasoning.  I have a cabinet full of dried spices, so I decided to make my own.  It turned out super yummy, so I thought I'd share.


Combine:

2 Tbsp chili powder
1 Tbsp crushed red pepper flakes (less if you like it less spicy)
1 Tbsp dried, minced onion
1 Tbsp dried, minced garlic
2 tsp sugar
2 tsp cumin
2 tsp dried parsley
2 tsp salt
1 tsp basil
1/4 tsp ground black pepper

(Make sure all of your spices are gluten-free, if necessary.)

Measure everything into a small container and shake to mix.


Add seasoning to your chili to taste.


Yum!  I can feel fall coming...

My favorite way to eat chili is on a baked potato, topped with cheese.  What's yours?


Pin It

Thursday, August 16, 2012

Cooking Plantains

A friend of mine gave me a whole case of plantains!  WOO HOO!!!  They were already ripening, so I waited until they were very ripe and sweet before I cooked them.

First I sliced the plantains, poured oil into a skillet so they were halfway submerged, and lightly fried them over medium heat.  They're sweet and delicious, even eaten by themselves!


I then browned beef, adding lots of garlic, onion, and salt.  Once cooked, put it in a bowl and chop the cooked plantains (now called amarillos) into it.


The sweet of the amarillos combined with the flavorful saltiness of the beef makes a DELICIOUS and hearty main dish!  It's kind of a simpler version of pastelon de amarillos or piononos, two of my favorite Puerto Rican dishes.

Do you eat plantains?  If so, how do you prepare them?


Pin It

Thursday, June 21, 2012

Raw Buckwheat Porridge -- Gluten-Free

We just bought another 50-lb bag of hulled buckwheat groats.  While trying to decide what to make for breakfast, my hubby found the most awesome recipe for raw buckwheat porridge at Oh She Glows.  It's gluten-free, involves no cooking, takes minimal effort, and is delicious!


You do have to plan a little bit ahead, because you first soak your raw buckwheat groats for at least an hour.  


This is way easy for me.  I get up at 6:30 am, and my kids don't get up until 8:00 am.  I can easily set the buckwheat to soak early and have them ready in time.  (The buckwheat pretty much doubles in volume after soaking, so plan how much you need before soaking.)

You then throw half of the soaked buckwheat in the blender with your sweetener and "milk" of choice (we used honey and almond milk so that everybody in the family could eat it).  We also threw in some blueberries and strawberries, as well as some flax seed and cinnamon (I don't recommend taking the lid off the blender while blending.  hee hee)


Mix the unblended, soaked buckwheat groats in with the blended ones, spoon into your bowl, and top with fresh fruit, nuts, etc.


The texture is a little bit different than most foods I'm used to, but it was delicious!  The kids also loved it!  This is way better than boxed cereals in the morning, it's cold and refreshing for these hot days of summer, and it's super healthy.  I'm sure it would be just as delicious cooked for a winter porridge.

Tomorrow, I may throw in some coconut and walnuts.  YUM YUM!!

ETA:  We made another batch last night to see if it stores well in the fridge.  It DOES!!!  So you can even make it the night before and serve it in the morning.  Yay!!!!


Pin It

Wednesday, June 13, 2012

Super Easy Fruit Dip

My mama makes the most delicious fruit dip.  You basically blend honey, cinnamon, and cream cheese into marshmallow fluff.  (I didn't say it was healthy, just that it was delicious.)  I can literally eat the stuff by the spoonful, though I don't recommend it.  It's especially good with bananas and cantaloupe.  I'm sure my kids would love it, but why would I want to take healthy, delicious fruits and dip them into something so unhealthy?  

Well, the other day while my kids were eating, I had an epiphany.  

I started with some vanilla yogurt.  (I typically make my own vanilla yogurt by adding honey and a splash of vanilla to plain yogurt.  Last week, the Dannon was on sale.  So I splurged.)


I spooned that into a bowl and added cinnamon.


Then you stir and serve!!  That's it!!  It's healthy AND delicious!!  My kids absolutely love it.  They've dipped strawberries, bananas, apples, blueberries (yes, this one was a bit messy), carrots, and my 2-year-old dipped her applesauce into it (don't even ask about the mess this made.  But she said it was good).  Enjoy!!
Pin It

Monday, June 11, 2012

White Chili -- Gluten-Free

So I know it's not exactly the chili time of year, but we actually had a cool couple of days a couple of weeks ago, so I made white chili.  White chili is so easy to make, and you can make it super-quickly or super-healthy, depending on how much time and effort you want to put into it.  =)

The original recipe is (I typically double all but the chicken):

1 can chicken broth
2 cans navy beans, drained
1 lb chicken, cooked
1 can diced green chiles
1/2 tsp oregano
1/4 tsp cumin

Heat on the stove.

(If you're making this gluten-free, be sure to use all gluten-free ingredients.)

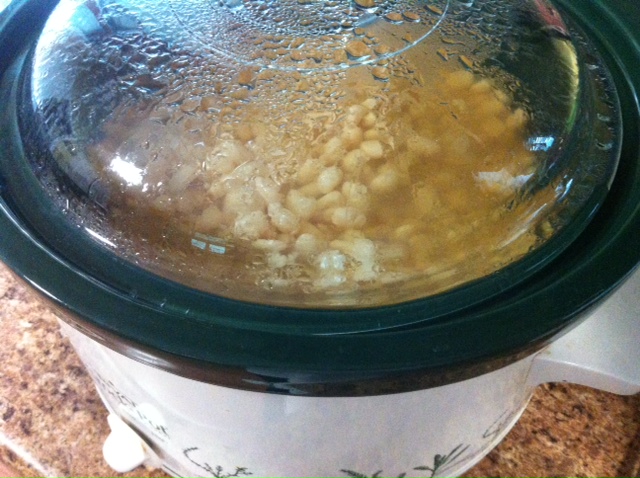
This recipe is soooooooooo easy to switch up according to what you're doing.  If you used canned chicken, canned beans, and canned broth, you can easily whip up a batch of this in minutes.  I typically cook dry beans ahead of time and freeze them.  I've recently discovered the ease of making dry beans in the crock pot.  Sooooooooooooooo effortless!!


For the chicken broth, you can use canned, make your own from scratch, or use bouillon.  I often use Better than Bouillon when I'm in a time crunch.  Yum!


If you don't have the time to cook chicken, use a can of chicken or even shred meat off a rotisserie chicken.

No matter which method you use, the ending result is delicious!  I like to throw some colby jack cheese in my bowl.  Yummy!  I also like to eat corn bread on the side.

No matter what the weather, my family eats this up!  What have you been cooking lately?
Pin It

Saturday, May 12, 2012

Homemade Taco Seasoning -- Gluten-Free

I LOVE tacos, taco salad, enchiladas...well, anything along those lines (well, in reality I like most any type of food.  Except for water chestnuts.  Those things are just nasty!)  A lot of taco seasoning packets you buy at the store have fillers, preservatives, gluten, etc.  So I decided to make my own.  All you need are some spices and a container to store it in.


This is the BEST taco seasoning recipe EVER!!!  Feel free to tweak it to fit your tastes and your family.  If you like it saltier, add more salt!  If you're on a salt-free diet, leave the salt out!  If you don't like eating corn, feel free to leave the corn starch out.  If you like it spicy, add more cayenne.  Well, you get the point.  I always make at least triple the recipe at once, then I leave it stored in the cabinet until I need it.  Then I just use whatever amount I need.  

Here's the recipe:

1 Tbsp minced onions
2 tsp chili powder
1 tsp salt
1 tsp garlic powder
1 tsp cornstarch
1 tsp cumin
1/2 tsp cayenne pepper

Simply measure all the ingredients into a container with a lid...


Shake vigorously, and voila!!  Taco seasoning without all the junk!  Enjoy!

HAPPY MOTHER'S DAY!!!!


Pin It

Saturday, February 25, 2012

Spaghetti -- Gluten-Free

My family loves spaghetti.  I used to make two different kinds of noodles each time:  whole wheat and gluten-free.  I'll admit it was a big pain.  I had to be careful not to contaminate the gluten-free noodles or sauce with whole wheat.  I had to keep track of what was in what colander when.  I had to time things to be done at the right times.  Etc.  And if you accidentally stick the fork you were using to stir the whole wheat noodles into the pan with the gluten-free noodles, that whole pan is now contaminated and no longer gluten-free (been there, done that.  Very frustrating!)

The simple solution would have been just feeding everybody gluten-free noodles.  But they're expensive!  And most of the brands have yucky ingredients in them that I didn't want to feed my family, anyway.  So I knew I had to come up with something else.

I've used brown rice as a substitute in other pasta dishes, so I figured, why not try it with spaghetti?  It turned out pretty good!  This is the kids' first choice, if they can't have noodles.


My favorite is raw zucchini.  I just wash and slice the zucchini and pour the hot sauce over it.  It's so delicious and healthy!


I've also been told that spaghetti squash is an easy substitute, as it already has the shape and texture of real noodles.  So I'm going to try that next!

I totally cheat on the spaghetti sauce.  I've made my own, but in reality, it's cheaper to just buy the twin-pack of giant bottles of Prego Traditional sauce at Costco.  (Yes, at this point in time, it's gluten-free.  Be aware that they can change their recipe at any time, however.)  Yum yum!!
Pin It

Friday, February 17, 2012

Mochi -- Gluten Free

Today, while at the store looking for some dairy-free "cheese," I came across this stuff called Mochi.  It's a food made from rice, and there were several varieties.  I figured I'd try it, so I grabbed the cinnamon-raisin one.  The only ingredients are:  organic sweet brown rice, filtered water, raisins, cinnamon, and sea salt.


It comes as this big, flat, dense square.  You simply cut it into smaller squares and bake it.


When baked, it fluffs all up like a little dumpling.


These have no added sugar, but they're still delicious straight out of the oven!!  I was giving them to my kids kind of as a dessert, so I let them dip them into a little bit of pure maple syrup.  Honey would be good, too.  

I have no idea how it is that I have been in the gluten-free and allergy world for so long, yet I have never heard of mochi.  It's fairly inexpensive (this package was less than $3), so easy to make, and delicious!!  I'm going to have to try some of the other flavors soon!


Pin It

Friday, February 10, 2012

Nut Butter Cookies -- Gluten-Free

Last month, I posted a recipe for flourless, nut butter bread.  In the comments section, my friend Vanessa posted a recipe for flourless, nut butter cookies.  I finally tried making them today, and they are to die for!!

You only need three ingredients:  1 cup of nut butter, 1 cup of sugar, and two eggs.


Mix all the ingredients together.


Drop on cookie sheet and bake at 350* for 12-15 minutes.


These were so easy (my hubby actually made them--his first time ever baking cookies)!  They are sooooooooo delicious!  Vanessa said she's mixed in chocolate chips, nuts, and coconut with great results.

Thank you for a great recipe, Vanessa!!!


Pin It

Friday, January 20, 2012

Nut-Butter "Bread" -- Gluten Free

An acquaintance gave me a recipe for a gluten-free "bread" made with only 4 ingredients:  nut butter, eggs, salt, and baking soda.


I thought to myself, "This lady MUST have left an ingredient out somewhere--like flour?--or else she's crazy."  But I guess I'm crazy, too, because I decided to try it anyway.

You first blend the ingredients in a blender (recipe with amounts at the bottom of this post), then you spread it in a pan.  I lined mine with parchment paper, and it worked nicely.  I used an 8x8 glass pan.  The mixture is a thick paste.


You then bake it.  


Somehow, by some miracle, this thick, gooey, nut-butter paste rises and turns into bread!  Here it is sliced.


It's actually light and fluffy!!


I then topped it with apricot All-Fruit and tasted it.


It was actually good!!  All the kids devoured it and were asking for more.  

The lady who told me about it said that you can also add squash, applesauce, nuts, raisins, etc, and it still rises well.  I think that next time I will either add applesauce, honey, or use a sweetened nut butter.  I used a natural one, so the bread itself wasn't sweet at all.

Anyway, this was a very successful experiment!!  If you add something different and it turns out great (or awful, for that matter), be sure to let me know!!

Here's the original recipe:

1 cup nut butter
4 eggs
1/4 tsp salt
1 tsp baking soda

Blend all ingredients in a blender and spread into a small greased or parchment paper-lined pan and bake at 350* until done.  (I baked it for 25 minutes in my 8x8 glass pan).

By the way, my hubby and I wanted to figure out how much this costs to make.  He bought a large jar of Peter Pan peanut butter at Wal-Mart (no HFCS, but still sweetened).  I only added in a couple of cents for the salt and baking soda, as we buy baking soda in bulk and it only uses 1/4 tsp salt in a batch.  The cost we came up with was $1.90 a batch.  Waaaaaaaaay cheaper than the gluten-free Udi's bread, and everybody in the family can eat this, including Little Love #5!!  And if you're the type who's avoiding grains, this is virtually all protein and is very filling!  You also don't need to put nut butter on the bread, since it's already made of it!

ETA:  I refrigerated the bit that was left overnight.  Today, it's just as soft and moist as it was yesterday.  YAY!!!

Enjoy!!!
Pin It

Thursday, January 12, 2012

Quesadillas -- Some Gluten-Free!!

Most of you know that I've been on bedrest for the past several weeks, hoping to put a stop to my preterm labor.  As long as we make it to midnight tonight, she'll no longer be considered a preemie!!!  So thank you so much to those of you who have prayed.  It'll be nice to have a full-termer after my last two being preemies.

Anyway, while I've been on bedrest, my poor Mr. Man has been doing most everything in the house, as well as going to work on work days.  One of the many chores he's had to undertake is most of the cooking.  Thankfully, I have several quick and easy recipes, meal ideas, and snack ideas that he's been able to employ, without resorting to boxed/prepackaged junk food (most of the time).

One such meal is quesadillas.  


Few meals at our house are truly simple, as most people would define simple.  We have three children who are gluten-free, and our youngest is also severely allergic to dairy, tropical fruits, and tapioca, among other things.

We start quesadilla meals by making peanut-butter-and-fruit wraps for our youngest daughter.  We make these on corn tortillas, sometimes fried, sometimes not.  She doesn't care either way.


Next, we do the quesadillas for the other gluten-intolerant children.  They also get the corn tortillas.  Last, we do them for my hubby and I and our older children, typically with whole wheat tortillas.  Simply put them in your skillet with the filling of choice--over medium-high heat--and cook for a few minutes until the cheese melts or your filling is warm, flipping once or twice.


When we need something super-fast, we just put in cheese.  Sometimes we do them like pizzas, with pizza sauce, pepperonis, and mozzarella cheese.  Tonight, my hubby made simple ham-and-cheese ones.  


They're also good with scrambled eggs, green peppers, and bacon for breakfast ones.  Great dipped in salsa or by themselves, they're easy to wrap up and take on-the-go.  They literally take minutes to make, and everybody loves them!

What interesting fillings do you like in your quesadillas?
Pin It

Tuesday, December 20, 2011

Chicken Tortilla Soup -- Gluten Free!!!

This soup has been my number one craving throughout this pregnancy.  I always use my big cast iron pot and double the recipe (except the meat) so that I have plenty of leftovers in the fridge!


Even the kids love it!  Here's the original recipe, and I'll post my changes below it.

1 lb chicken, cubed and cooked
1/2 tsp garlic
1/4 tsp cumin
1/2 tsp chili powder
1 Tbsp lemon juice
1 cup chunky salsa
1 cup frozen corn
2 cans chicken broth
black beans
tortilla chips
cheese

Throw all but the last 2 ingredients in your pot, and bring to a boil.  Break up some tortilla chips in your bowl, pour soup over them, and top with cheese.


When I make this recipe and I'm in a hurry, or while I've been on bed rest, I often use a can of chicken instead of cooking some.  Instead of using chicken broth, I use water and add a bit of Better than Bouillon to it.  The original recipe didn't actually call for beans, but it's so much better with them!!  I use whatever kind I happen to have already cooked in the freezer.  If I don't have any cooked, I'll cook a package of lentils and throw some of them in.

If you need the recipe to be gluten-free, make sure you use a gluten-free salsa, etc.  This is one of the quickest, easiest, and yummiest meals!!  I LOVE soup--especially in this colder weather!! Pin It

Wednesday, September 7, 2011

Sausage and Rice Skillet -- Gluten-Free!

Here's another one of our favorite recipes.  It's sooooooo easy to make and easy to change-it-up for some variety.  Can you tell we like sausage?  And rice?  And cheese?  (If you missed my last cheesy sausage recipe, catch it here.)

Here's what goes into it:

3 cups rice (measured dry)
1 lb sausage (any kind)
beans (any kind), however much you want
corn (canned, fresh, or frozen), however much you want
stewed tomatoes (canned or make your own)
cheese

Start your rice cooking.  Once again, I use my rice cooker so that I don't even have to think about it again until I'm ready for it.


While that's cooking, get out your sausage.  My absolute favorite sausage for this meal is Whole Foods' spinach feta chicken sausage.  It's soooooooo delicious!!


My Mr. Man's favorite in this is chorizo.  We've made this recipe using all different kinds of sausage.  Each one adds its own flavor, so that's an easy way to add variety to this recipe.  I usually throw in whatever we happen to have around.  If you're making this recipe gluten-free, make sure that your sausage and other ingredients are all gluten-free.

Squeeze your sausage out of its casing and brown it.


Once it's browned, you'll be adding everything else.  If you have a large skillet, you'll be able to do everything in it.  If not, put your sausage into a large pot and add everything there.

Add your cooked rice...


...add your stewed tomatoes...


...add your beans (this is another way to add variety to this meal.  My favorites in this recipe are black beans, but I'll grab whatever I happen to have the most of in the freezer.  Right now it's pinto beans, so pinto it is!)...


...and add your corn.


Mix it all up and let it cook until it's all heated through.


Once it's all finished, top with cheese.  I typically use a fiesta blend, but right now I have a huge bag of cheddar, so I used that.  See how much you can switch this up and how easy it is to just use whatever you have on-hand?  I typically scoop some out for my Little Love #5 before I add the cheese, since she's severely allergic to dairy.  However, since the sausage I used already had cheese in it, she can't eat this batch anyway.


Once the cheese is melted, it's ready to enjoy!  Mr. Man loves eating it on chips.  I love simply eating it with a fork.  

So go make some and let me know what your favorite sausage and bean combo is!
Pin It

Thursday, September 1, 2011

How to Cook Dry Beans

Dried beans are a WONDERFUL food--they're nutritious, a good source of protein and fiber, and they're CHEAP.  They make a great filler in so many foods.  There are so many benefits, but people just don't seem to use them very often.  Many prefer the convenience of canned, many simply don't know how to cook dried beans.  They're so easy to do, and I don't want you missing out, so I'm going to show you!

Dried beans come in every variety you can find of canned beans.  You can buy them at any grocery store.


I like to cook beans in batches of 5 lbs at a time.  Once cooled, I freeze them in smaller portions.  Then, when I'm making soup, tacos, or whatever else that I want to throw beans into, I just grab a bag of them out of the freezer.  Nearly as convenient as opening a can, but without the added salt and over processing!  And cheaper!

Once you have your beans out, slowly pour them into the colander.  Pick out any little clods of dirt or stones.  I know, that sounds frightening to have dirt in your food--but that lets you know just how much closer to nature this food is than the stuff you get in the cans!  So just pull out the dirt, and get over it.  =)


Then rinse the beans, removing any residual dirt (don't worry, by the time they're all done your beans will be nice and clean).


Next you soak your beans.  There are two methods for doing this.  Either way, you first put them all in a large pan.  Add water--more than just enough to cover them, as they'll absorb it and plump up as they soak.


For a quick soak (for example, making these in the morning to eat for dinner that same night), you then bring the beans to a boil, boil for 2 minutes, remove from heat, then cover and let stand for an hour.

I prefer the overnight soak.  It takes a bit more planning to start the night before, but it saves a lot of money and energy--you don't have to run your stove to bring all of that water to a boil for this step.  You just put the lid on the pan and let the beans soak for 8 hours.


In the morning, you'll see that the beans have plumped up.  Drain and rinse them.


Now it's time to cook them.  Wash out your pan and put them back in.  Again, they'll absorb a lot of water and plump up as they cook, so add plenty more water than just to cover them.  (The instructions on the bag say to make the water hot first, then add the beans.  I find this an unnecessary step and just add the beans to the cold water before the cook).


Put them on the stove with the lid tilted, and bring them to a boil.  Once boiling, turn the heat down a bit and simmer for 1.5+ hours, or until the beans have reached your desired tenderness.


Once finished, drain, rinse, and add them to whatever recipe you're making!

I throw beans into most every soup I make.  For tacos or taco salad, I typically use 1/2 a pound of ground beef (or no beef at all) and 1+ pound of beans.  I flavor them just like you would any taco meat, and you can hardly tell the difference!  You still get your protein, you still get your great taco flavor, but it's at a fraction of the cost.

You can even make cake with beans!  I've made this delicious, gluten-free cake many times, from The Spunky Coconut.  Everybody who tries it loves it and can't believe it when I tell them I made it from beans!

Many times I'm making taco salad or some other recipe and realize I don't have any cooked beans in the freezer.  *GASP*  This is where lentils come in handy.  Just simmer for about 20 minutes and they're done!  Again, they're a great filler, nutritious, and they take on the flavor of whatever food they're in.


So if you've never cooked with dried beans before, give it a try!  They're easy, inexpensive, delicious, and nutritious!

What have you made with beans lately?
Pin It